


It does a great job. Very well worth considering
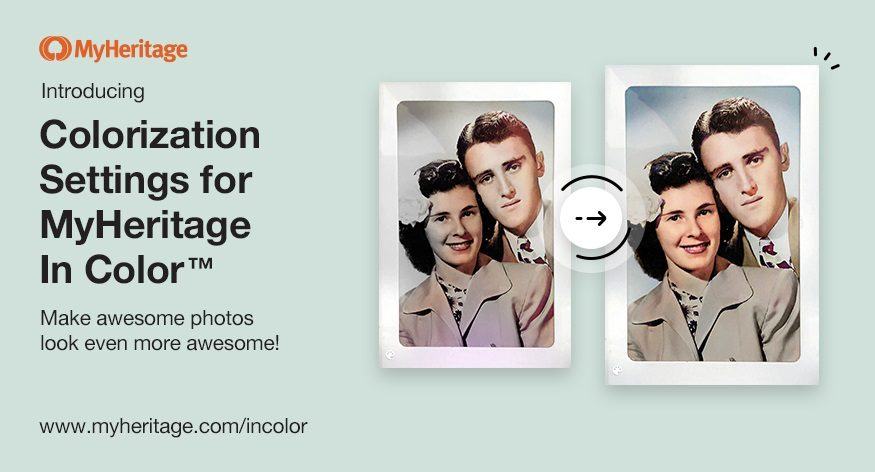
New: Colorization Settings for MyHeritage In Color™
MyHeritage In Color™ is an automatic colorization feature that brings your old black and white family photos to life using sophisticated machine learning technology. It has become one of our most popular features recently, with nearly 11 million photos colorized in less than 3 months!
We are pleased to announce that it is now possible to customize the colorization settings of MyHeritage In Color™, to improve its results even further.
The quality of automatic photo colorization depends on many factors, such as the quality of the original photo, its resolution, lighting, contrast, sharpness, and so on. In most cases, MyHeritage In Color™ will produce excellent results. However, in some cases there is room for improvement. Adjusting the settings allows you to fine-tune the colorization process, giving you more control over your final image and resulting in a higher-quality colorized photo that you’ll be more than proud to share.
Accessing Colorization Settings
Colorization settings can be accessed only after you’ve colorized a photo, and only in the “My photos” section of the website. To access the settings, select “My photos” in the “Family tree” menu of the website. Then click a photo you previously colorized. Such photos will have a color wheel icon in their bottom right corner, as shown below.
‘My Photos’ section on MyHeritage. Colorized photos are indicated (Click to zoom)
Click one of the photos you’ve colorized, to visit the photo page. Then click the cogwheel icon in the top right corner, to open the Colorization Settings.
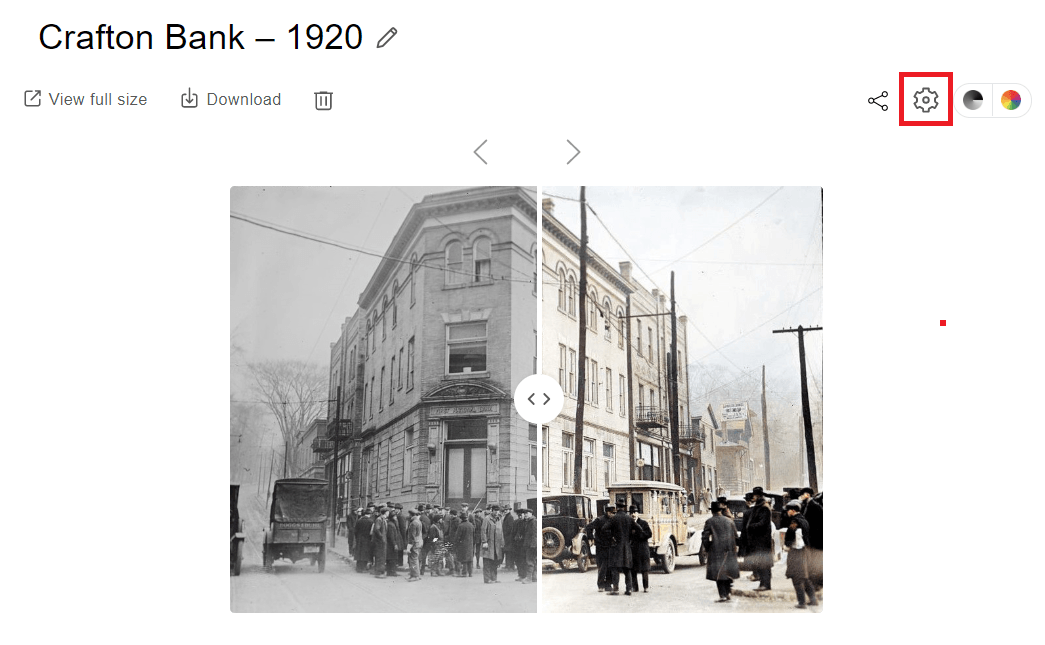
Accessing the Colorization Settings
The following settings panel will appear on the right of the screen:
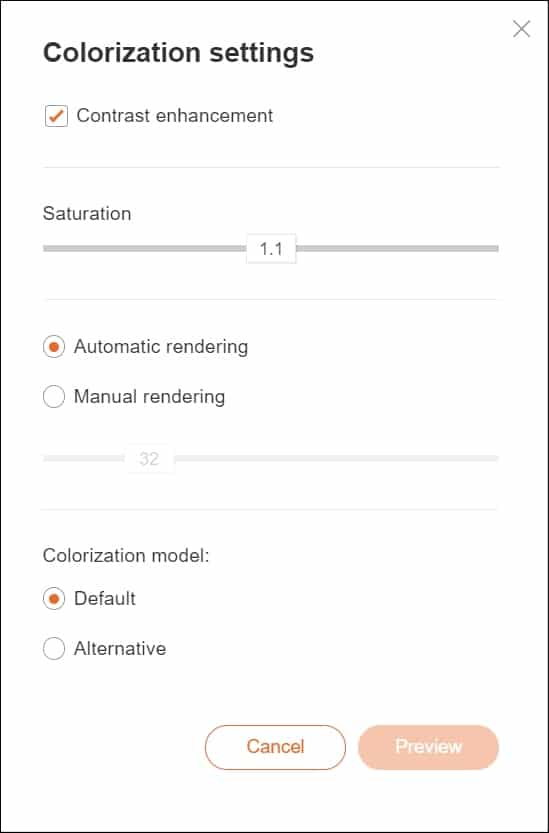
Colorization Settings (click to zoom)
Adjusting the settings
The default settings were selected because they usually produce the best results. However, sometimes tweaking the settings can give better colorization results.
Note that changing the settings is more an art than a science: each photo is different, and a setting that works beautifully for one photo might not work well for another. The best way to improve a photo is to experiment and see what works best. Because of that, the settings do not persist, which means that changes that you make in the settings will affect the current photo, but will not affect other photos that you have already colorized or will colorize later on.
Below is a brief explanation of each of the settings:
Contrast enhancement
By default, all colorized photos undergo a post-colorization algorithm that enhances their contrast. Usually this makes the features of the photo stand out more clearly. However, sometimes the contrast may feel exaggerated, and in such cases, you can deselect Contrast enhancement and see if you prefer the result without it.
Saturation
The saturation slider allows you to adjust the intensity of the colors within your colorized photo. By default, the saturation is set at 1.1. You can increase it as high as 1.3, or decrease it to as low as 0.9.
If you find the colors in your photo to be too bright or intense, you may prefer to decrease the saturation. If they are not sufficiently bright or intense, try increasing it.
Rendering
Rendering is the process of generating your colorized image. The default automatic setting is 32, which generally produces optimal results. However, you may get better results with a higher or lower number. To try it out, select “Manual rendering” and use the slider to select a higher or lower number between 16 and 96. In general, colorization of lower resolution photos looks better with a lower rendering number, and higher resolution photos look better with a higher rendering number.
Colorization model
The Default model of colorization works best for the vast majority of photos. The remaining small percentage of photographs might look better using the Alternative model of colorization. Give it a try and see how it looks. If your colorized photo has problems with some of the colors, like “zombie skin” (limbs or faces that appear “dead” because they remain in black and white) or features people in uniform that is wrongly colored, try the Alternative model and it can fix the problems.
Once you have adjusted any of the settings, the “Preview” button will be enabled, and you’ll be able to click it to preview the new settings. Click and hold the photo to compare the adjusted version with the previous version.
If you’re satisfied with the results, click “Save” to apply the new settings. Your colorized photo will be replaced with a new version colorized with the new settings. If you’d rather return to the previous settings, click “Cancel.”
If you saved the result and had a change of heart, you can enter the settings again, return them to default, and save again.
Examples
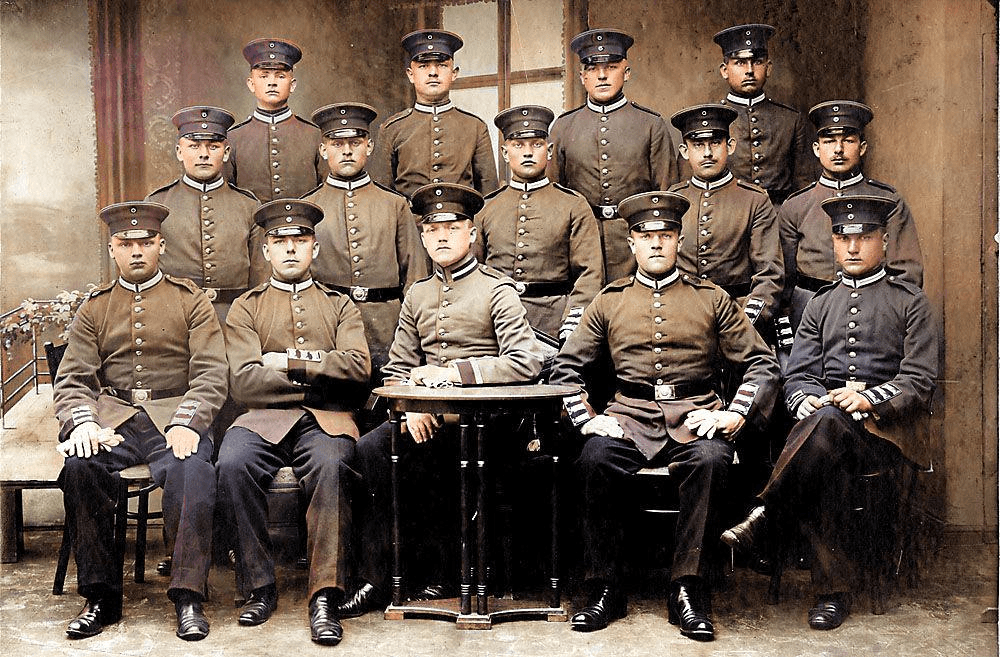
Judy Russell, known as the Legal Genealogist, posted a blog about MyHeritage In Color™ and included several nice examples. But one of her photos did not colorize well:
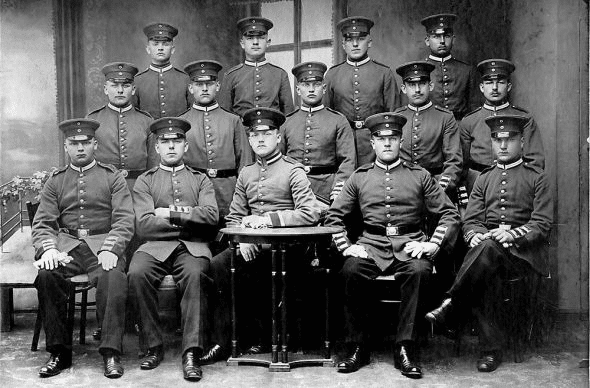
Here is the colorized version that Judy posted:
The soldiers’ uniforms clearly came out very badly!
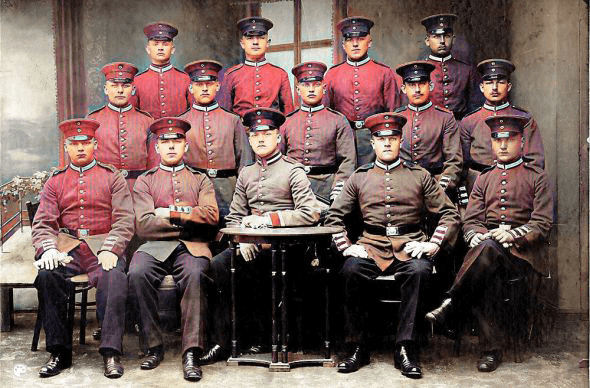
Using the settings dialog, and choosing the Alternative model, much better results are obtained:
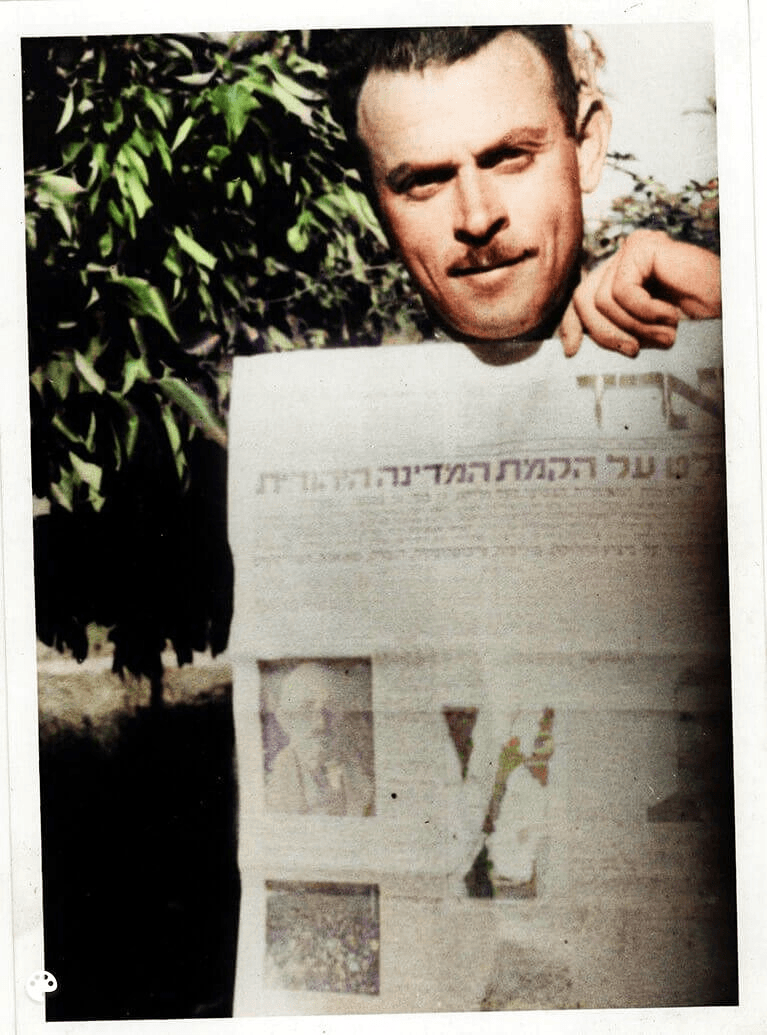
When Israel received its independence, an iconic photo was taken featuring the newspaper announcing the news held by a well-known persona:
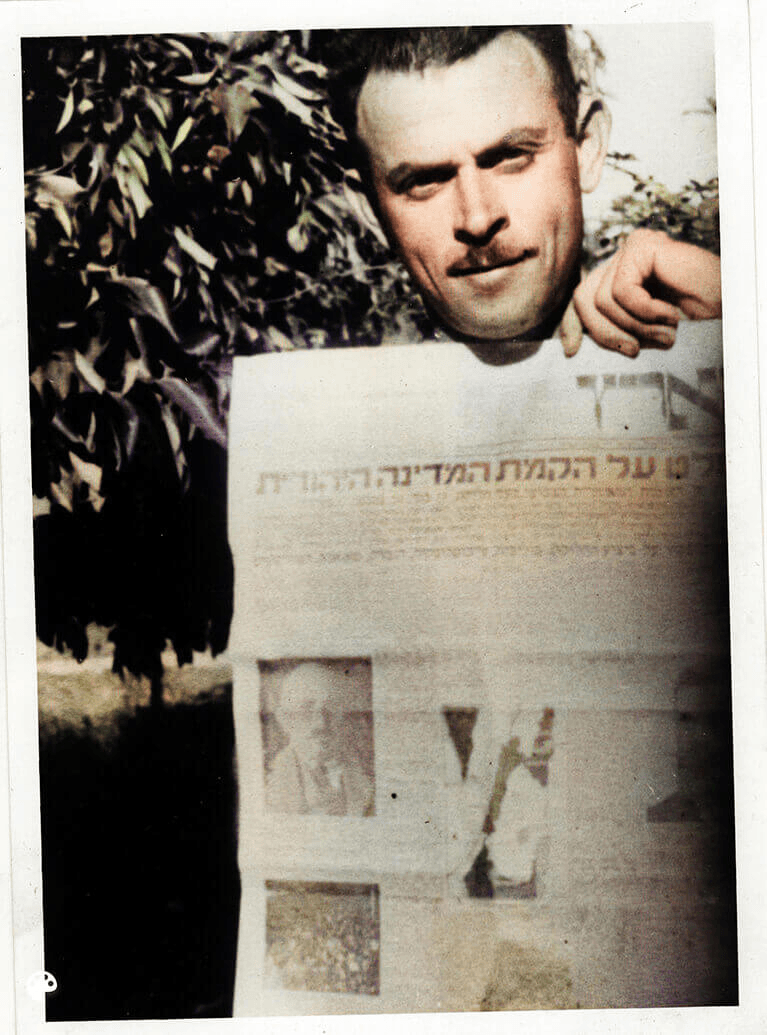
The colors didn’t come out well. His face has “zombie skin” areas that look greenish, and conversely the tree behind him doesn’t look green like it should.
Using the Colorization Settings, a much better result was obtained:
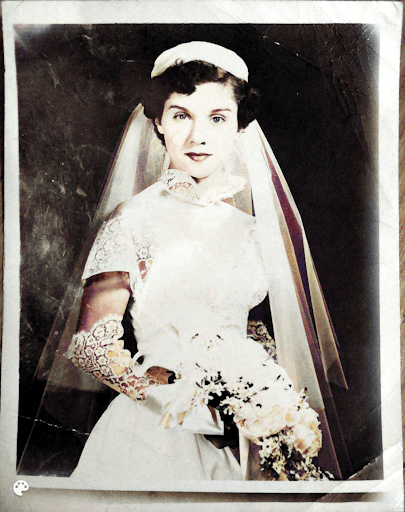
The photo of this lovely bride, Betty Lieberman, was taken in Columbus, Ohio in 1951:
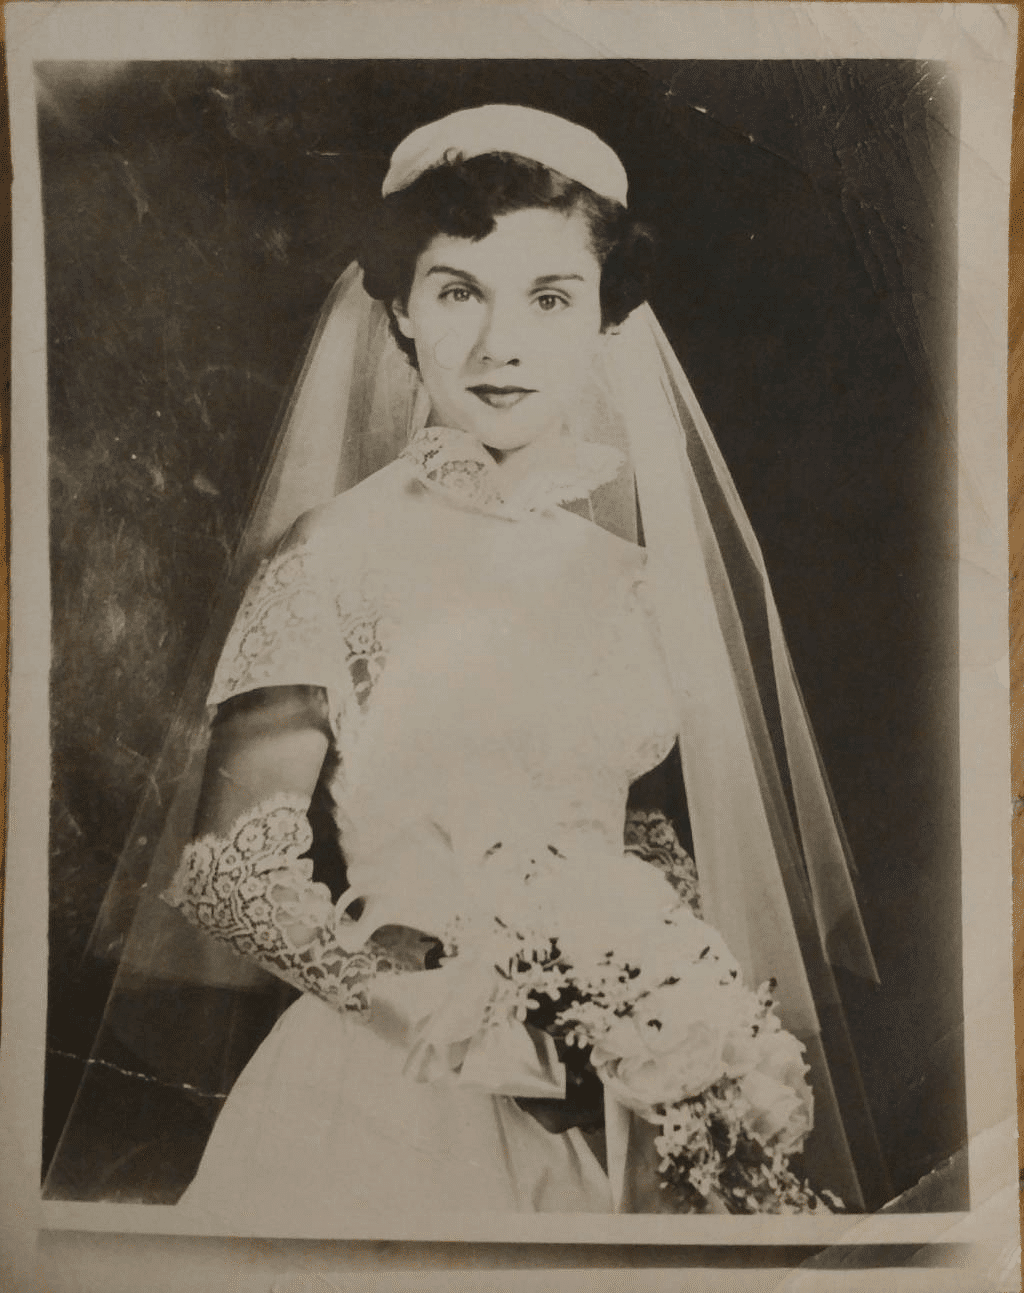
Due to the sharp lighting and strong contrast of the original photo, the colors in the default colorized version are faint and Betty comes out looking quite pale.
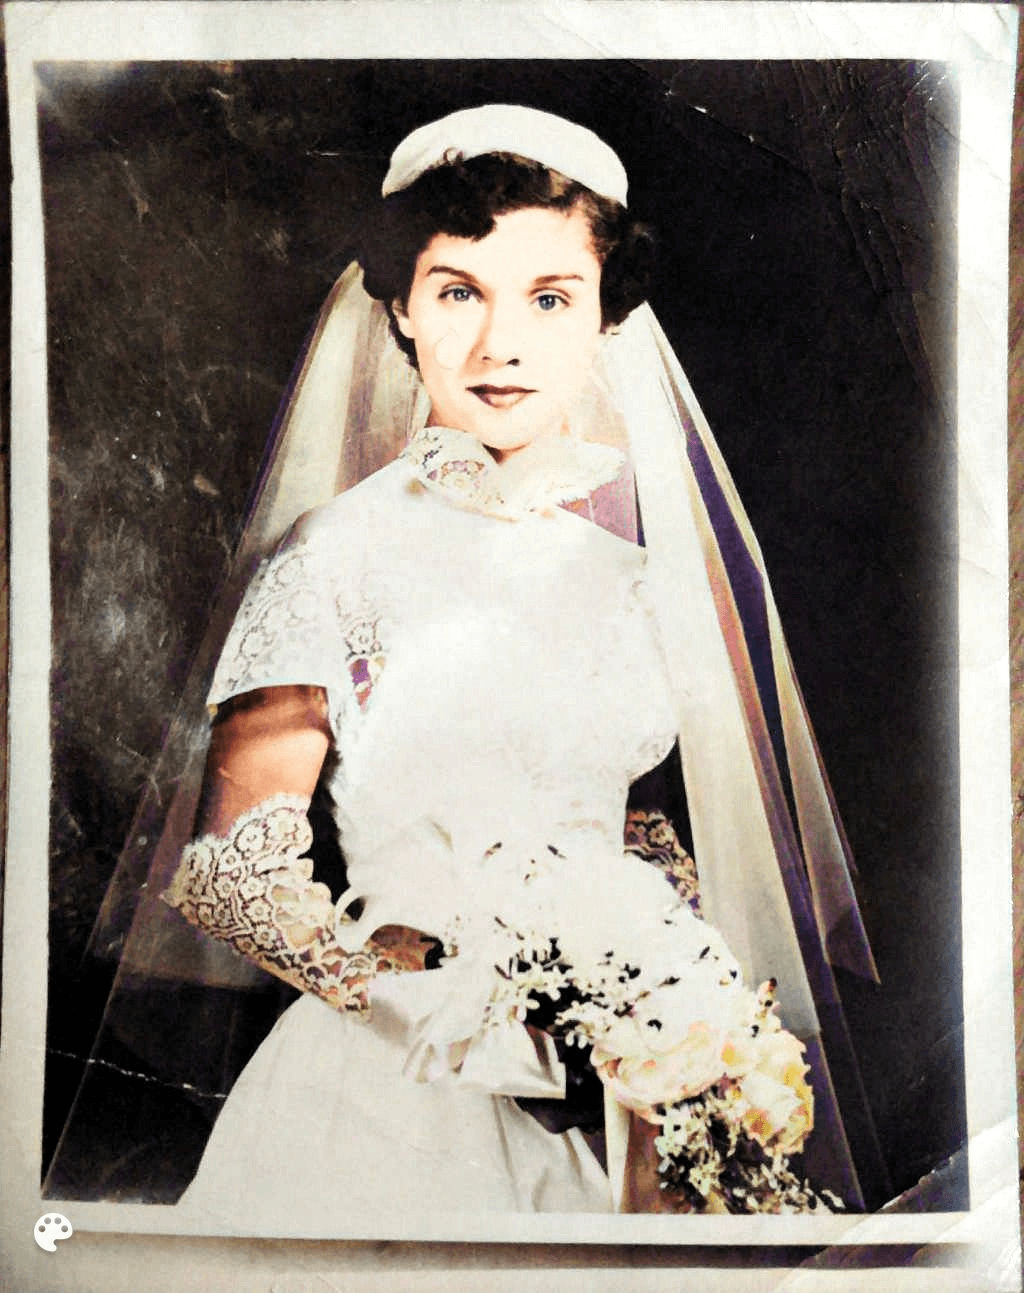
Increasing saturation and switching to the alternative colorization model really brings out the colors, especially in her face — her skin, her eyes, and her red lipstick:
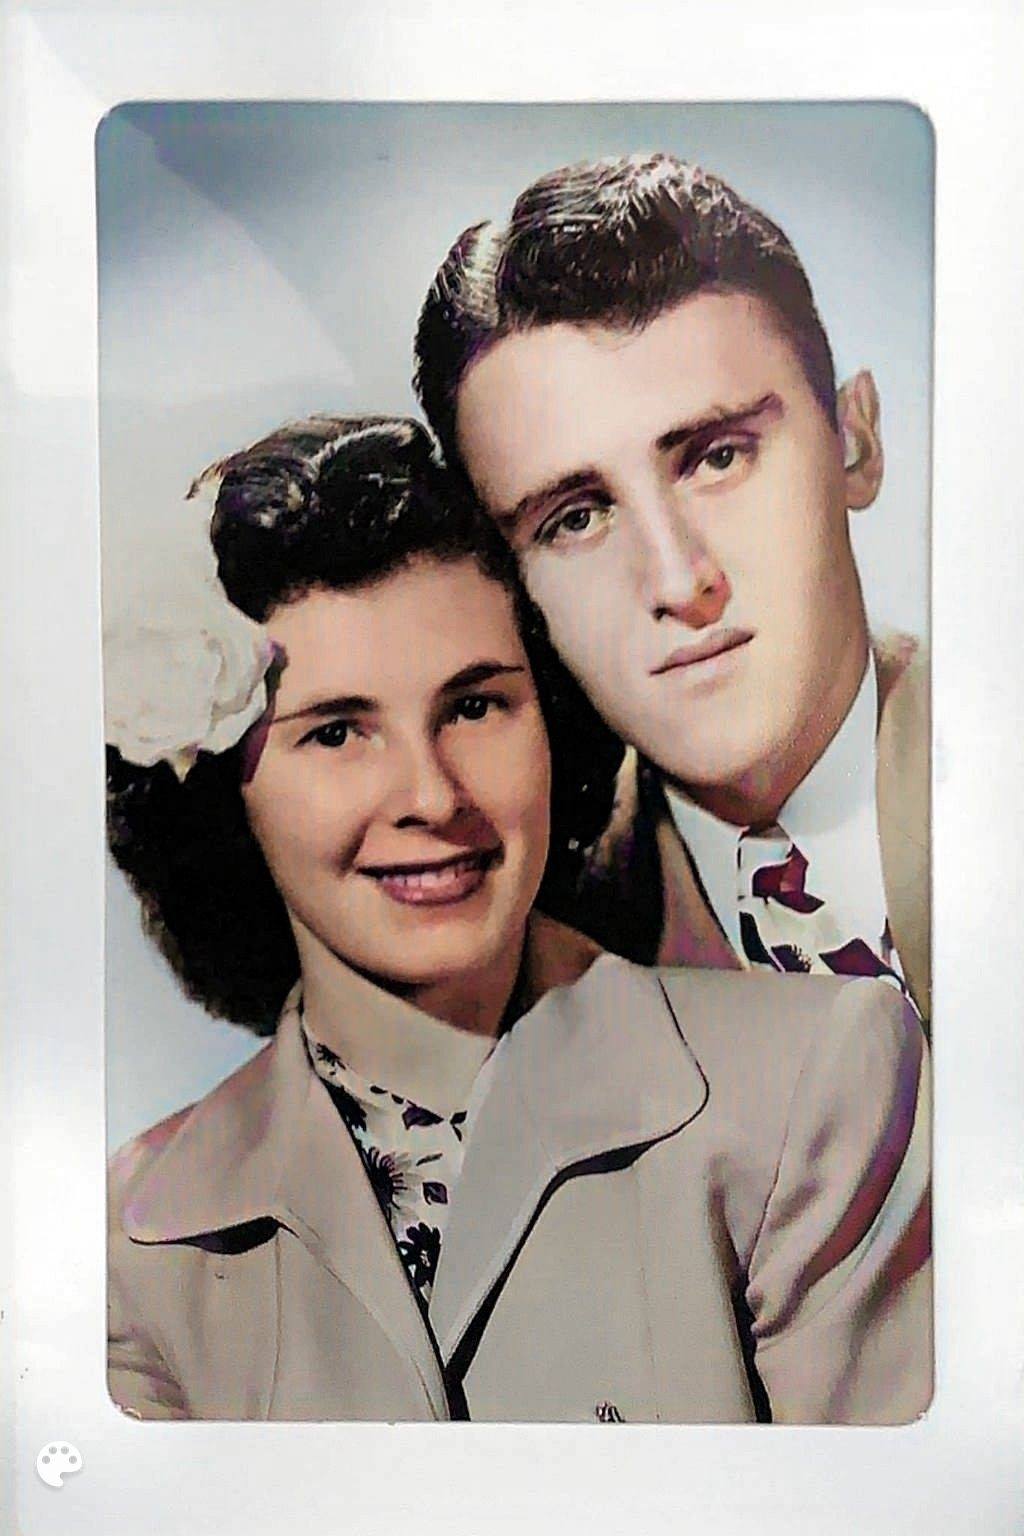
This beautiful couple, Jacquie and Norman Levy, were photographed together in 1947 in Denver, Colorado:
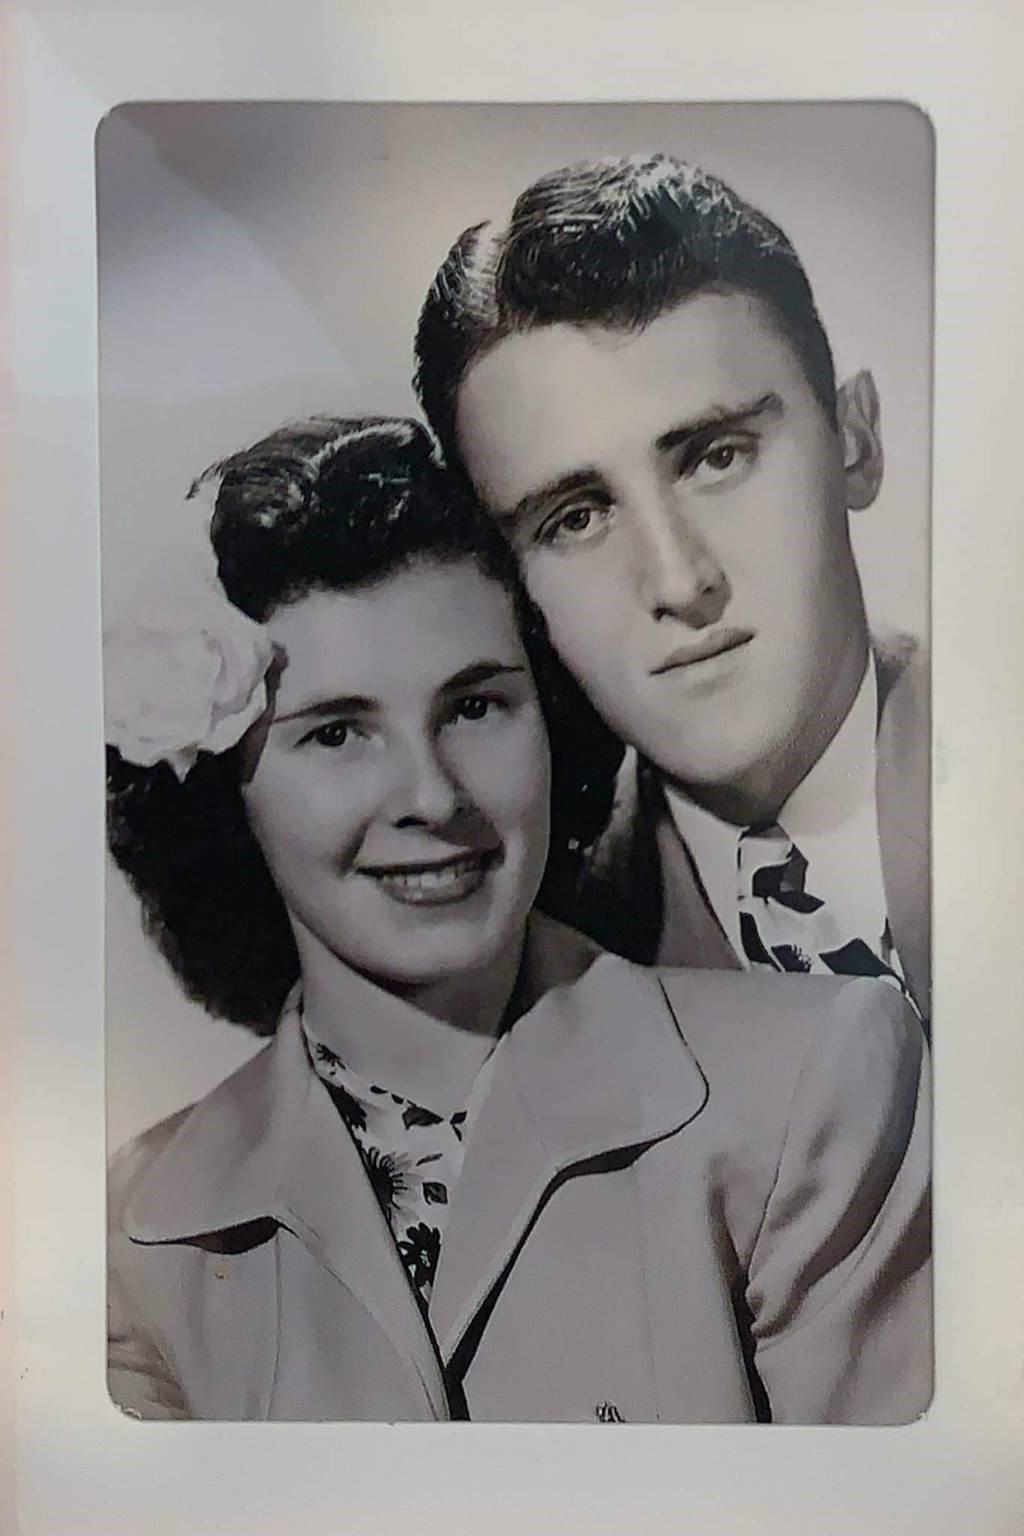
Though the default colorized version does give us an idea of their skin tone and hair color as well as Jacquie’s lipstick and the white flower in her hair, the color “bleeds” a little into her jacket:
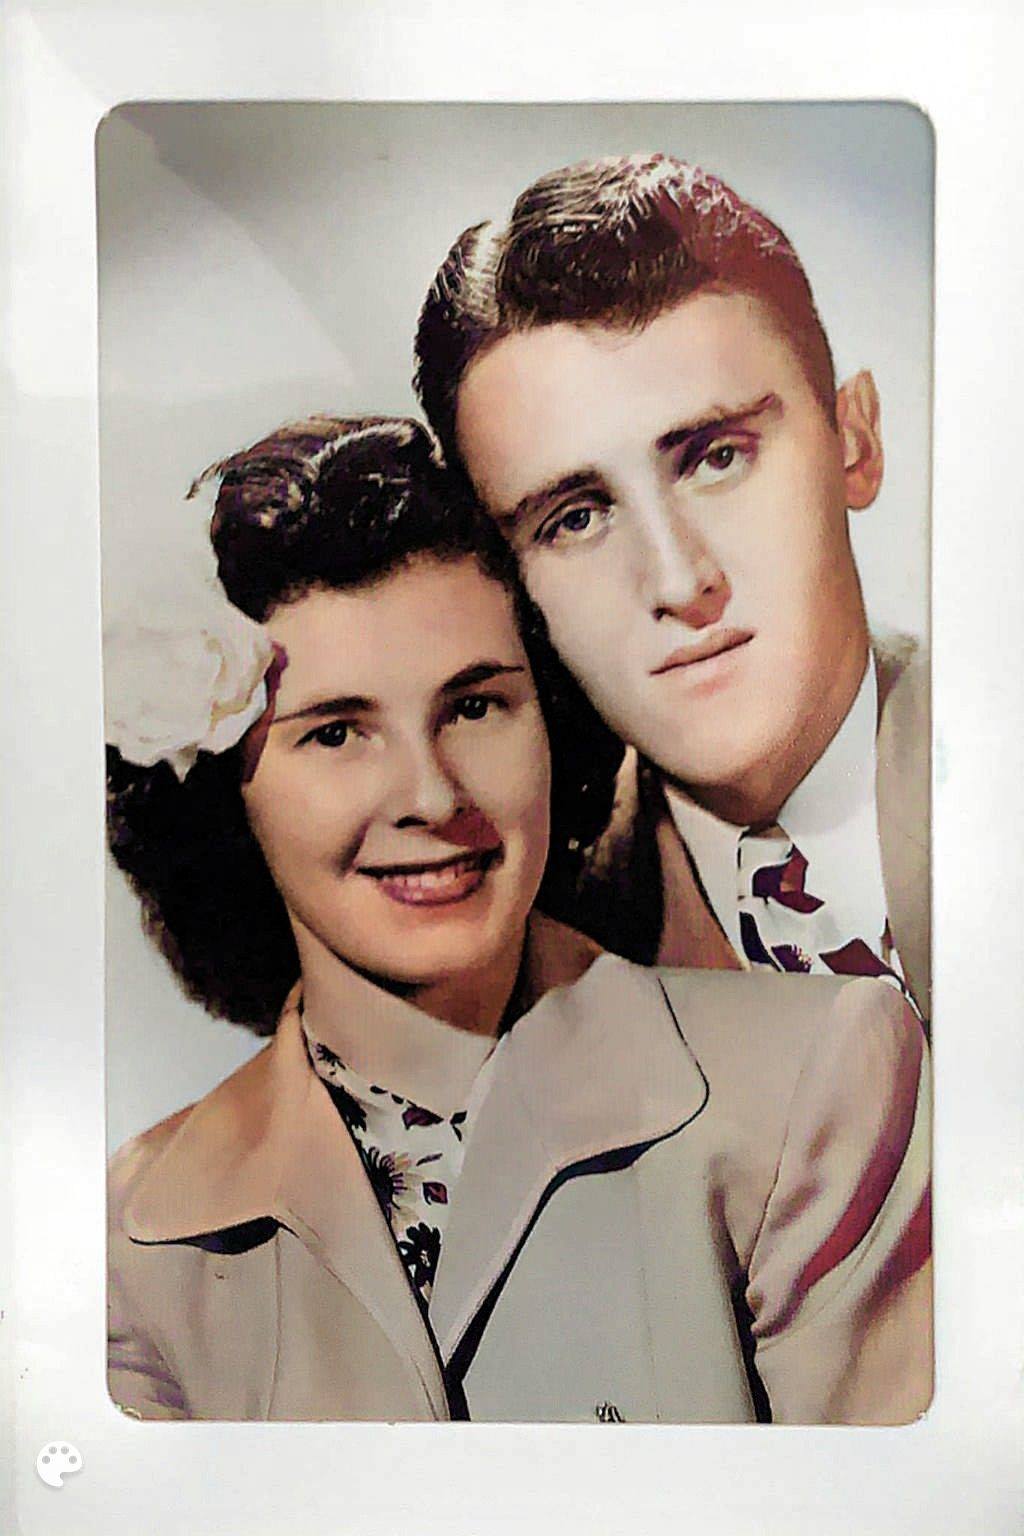
Lowering the rendering to 16 produces a blue background that gives us some nice contrast, making their faces “pop” more, and reducing saturation gives Jacquie’s complexion a slightly more natural color. The clothes look more natural too:
Conclusion
The new capability to customize the colorization settings, allows you to achieve even more stunning results with MyHeritage In Color™ than before.
Adjusting colorization settings is a paid feature and you’ll need a Complete subscription to access it. The feature is currently available via your desktop or mobile browser, but not yet through the mobile app.
Colorization settings give you more control over photo colorization and can make awesome photos look even more awesome! Check it out today.
Kathy BA
May 7, 2020
This tool is amazing and I’m thrilled to see these addtional controls. Can’t wait to try it. I had tried a few When it was free and one of them had a weird skin tone on someone in the photo. There was another one where the uniforms were all uneven like the example you show. I am going to have to get a real Subscription now because I’m hooked. My research had hit a brick wall so I unsubscribed. But I think you found the bait to make me come back. 😉 thanks for employing this technology into your site. I’ve hired professionals to color old photos and this seriously works just as well. And only takes one minute. Amazing.